Farnhamtri
Group Training Rides
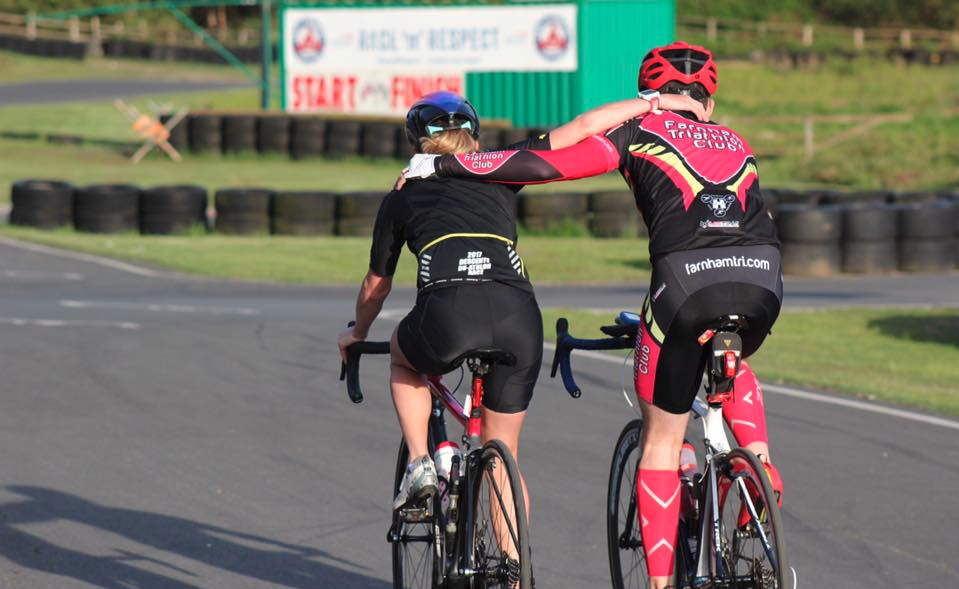
Throughout the year the Club organises a social training rides. The ride is designed as a group activity where the aim is for the group to cover a certain distance together. It is not a race, and the general rule is that the group goes at the pace of the slowest cyclist. In this way it is hoped to provide opportunities for:
- • a sociable and enjoyable ride.
- • group training (drafting, pace line etc.).
- • encouragement for less fit cyclists.
- • experience for newer cyclists in riding a set distance.
The distances and terrain chosen, vary each ride according to the difficulty of the ride and the time of year, e.g., a hilly ride will likely be shorter, off road mountain bike rides out of season. With longer rides, there will usually be a shorter option for those not wishing to go the full distance. Distances vary between 20 and 80 miles.
The club newsletter will contain details of the next group ride and forthcoming dates.
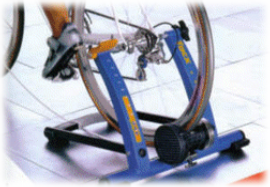
Turbo Training
As the dark, wet, winter evenings descend upon us, many club members will be sitting on their turbo trainers. The coaching team has pulled together to develop a virtually coached turbo session for the winter season.
Key Benefits of the Virtual Turbo Sessions
Convenience: no need to pack your trainer into the car on a weekly basis
Coach-led: a coach will structure the workout with a focus on progression throughout the winter. Assess to a coach also means a focus on drills and technique that many of us ignore when riding on our own.
Community: why suffer on a turbo all by yourself when you can join with your fellow club mates and build a sense of community and comradery
No Cost: with all the cost of living crisis – this is a great opportunity to leverage coaching and community at no cost
What do you need
Any type of turbo trainer or static bike – it does not need to be a posh smart trainer
Some sort of device you can connect to a video call with (mobile phone, tablet, computer). From a health & safety perspective, the coach will need to see you
An ability to connect to the virtual session with audio – both so you can hear the coach – but equally so the coach can hear from you
The Details
- Three Thursdays each month – 19:15 – 20:30
- The 3rd Thursday will be a Zwift Team Time Trial for those members who are active in Zwift.
- Sign up via ClubSpark using the Book Training link in header.
Winter Cycling
To make the most of your winter cycling follow this sound advice from Fraser Kennedy.
Some people view cycling in winter as purgatory, but in many rider’s eyes, it’s where the preparation for next year’ race success comes from, as well as providing an enjoyable means of socialising with club mates.
Whilst winter rides can be quite a sociable affair, riding at a speed that allows conversation, don’t rely on your ride-
Winter training isn’t like summer cycling with warm clothes, but is a means of getting preparation or a base for next season. Usually, this means low intensity efforts for a longer duration in order to get your body more effective at burning fuel as well as training your muscles.
By following some of the advice given here, you should get more out of your winter riding which will hopefully translate into better results next year.
The 3 things to consider for winter riding are your bike, you the engine and the fuel that you put in the engine to propel it.
Firstly, winter weather and conditions are not good for your bike due to the water, grit and salt upon the roads. With a little bit of preparation, you should be able to prevent a lot of the damage that can occur over winter.
Good tyres are a must for winter – something a bit more puncture resistant for a start. Winter tyres are usually a bit cheaper that racing tyres, are more puncture resistant and last longer. Turning up for winter rides on a pair of worn racing tyres is only asking for trouble. It’s also worth checking your tyres before every ride – remove any embedded flints and check for sidewall cuts etc. Fix / change them before you leave home can prevent a lot of hassle out on the road.
On the subject of puncture prevention, eventually they will strike and being prepared is important. This means carrying at least one spare tube, tyre levers, a repair kit and a working pump. Don’t rely on anyone else – I’ve been on some rides where everyone got at least 2 punctures.
I’d recommend carrying a set of self-
Equally, make sure your bike pump works by testing it. Whilst some of these mini pumps look great and are very light, some are about as useful as a chocolate fireguard as they can’t achieve a reasonable pressure, or take so long that everyone’s got hypothermia whilst you’ve cooked yourself doing 500 strokes with your mini-
Finally, if you fancy freezing your fingers to the valve, get a CO2 inflator and then be prepared for a long walk home…
One of the main hazards of riding in winter is water on the road, and the pleasantness of having it sprayed in your face by the rider in front. There’s no excuse for not having mudguards fitted as you can get some clip-
Make sure that your bike is well serviced, with a well-
One of the key things in enjoying your winter cycling is getting the right clothes for the job.
Whilst blue knees are very nice to look at, save us the honour of keeping them covered until spring.
Take a look at the weather forecast before you leave – so even though it’s a sunny winter’s day when you leave home, don’t be surprised when a cold front blows-
Don’t make excuses about the weather, it’s only about people having the wrong clothes.
Try to avoid over-
Layering is the best solution, with the object to stay warm, but not necessarily dry. Even the best breathable fabrics such as Gore-
For the legs, a pair of fleece-
Keeping the extremities warm makes a huge difference to your comfort. A good pair of overshoes stop your feet from getting cold and in many cases wet as well. Likewise, good warm gloves keep your hands warm. I’m not a big fan of waterproof socks and gloves as they tend to trap moisture and get cold more quickly, particularly after 2-
Finally, a thin fleece headband or hat under your helmet will keep your ears warm. Clear or yellow lenses on your glasses are good to keep the muck out your eyes and prevent infections such as conjunctivitis.
The final critical component for your bike in winter is lights and make sure you can be seen. Big advances have been made in recent years in terms of quality and visibility of lights. I’m sorry, but a pair of EveryReady’s finest don’t really cut the mustard as they jump from the bracket and bounce down the road into oblivion.
There are many relatively cheap flashing red LED lights available that you can fit to yourself or your bike. In my mind the more the better.
Front lights are a bit more problematic if you’re riding on unlit roads as most small battery lights aren’t powerful enough to illuminate the road. You really need at least a 10 watt halogen lamp for the front, minimum. The problem is that powerful lights need powerful and sometimes heavy batteries with the best systems costing hundreds of pounds. You don’t need to be so extravagant, but if you value your life and want to get the most from your winter cycling, £50-
Having dealt with the bike and the rider, there’s one final ingredient missing – the fuel for the engine.
I still don’t understand how people can turn up for a 3-
Your energy requirements in winter can be greater than in summer as you require fuel to power your muscles and to keep warm. Equally, dehydration can be issue if working hard – particularly with warm clothes. Allow for 0.5 – 1.0 litre of fluid for every hour of riding. Use your favourite brand of energy drink, or at least some orange squash to give a little sugar boost. Try and drink regularly, a sip every 10-
To supplement your drink, some food will help to stave off the dreaded ‘bonk’ when your blood sugar / glycogen levels drop and your body starts metabolising stored reserves. Avoid anything too sugary as you can suffer from glycemic ‘spikes’ which can give you a quick boost and a corresponding low. Energy bars / Power bars can be expensive, so bananas, dried apricots / dates are good alternatives, as are some snack bars.
Knowing what will work best for you may take some time to work out, and we all learn from our own mistakes, but hopefully this should help you from making the most from your winter rides.
Fraser Kennedy
New Cycle Training Venue - Blackbushe Kart Track
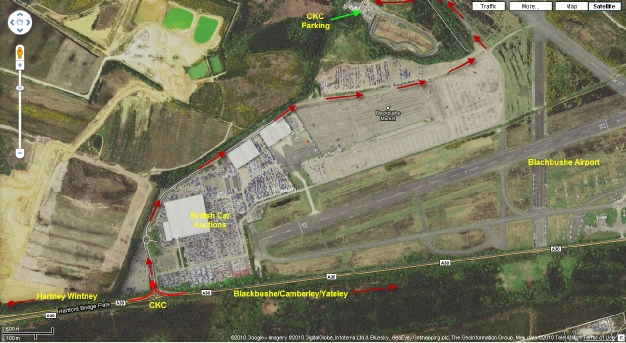
FTC has secured the use of Blackbushe Kart Track for bike interval training sessions.
The track is a smooth surface ½ to ¾ mile circuit located behind the British Car Auctions site at Blackbushe (see link below).
Full details of session times will be issued in the weekly newsletter but in general sessions will be held on Thursday evenings as follows:
Adult 7pm/7.30pm to ~8.15pm depending on light (Start time will be advised in the weekly email)
Training will be concentrated on interval sessions and bike handling skills. There will also be the opportunity to practice riding in a pack.
Cost of the session will be £6.
For the location of Blackbushe Kart Track click here.
In order to access the track, come in past the car auctions buildings and continue through past the compounds and car parks to the end, turn left and you will find the entrance to the track through a gate on the left. You will need to drive down a steep pathway and into the car park area.
For those of you who don’t know it, it is a very smooth ½ to ¾ mile circuit used for racing Karts.
As usual, no helmet no ride.